

The scientific method is a 6 step method scientists use to conduct experiments and learn about the world around them.
It is essentially a framework on how to ask a question and then answer it.
We all make observations and ask questions about the world around us. Then, we make a guess (or hypothesis) about what we think the answer is. The scientific method is the process to determine if your hypothesis is correct.
Whether you are making slime at home, growing seeds, or conducting a much more elaborate experiment, you can use this free scientific method worksheet to guide your process!
Table of Contents
Download the Free Scientific Method Worksheet
Implementing the scientific method in your at home & fun science experiments, is a great way to reinforce logic and problem solving skills.
There are 6 steps to the scientific method, plus one feedback step:
- Make an Observation
- Ask a Question
- Form a Hypothesis
- Test Your Hypothesis
- Observe Results
- Form Conclusion
The “7th” step to the scientific method is the feedback step, where you make an iteration or ask a new question to test. This step loops back to the first step of your next experiment
Now, let’s dive into each step of the scientific method with an example!
In this example, we’ll walk through the scientific method in an experiment where you’re testing how seeds may grow in different types of soil.
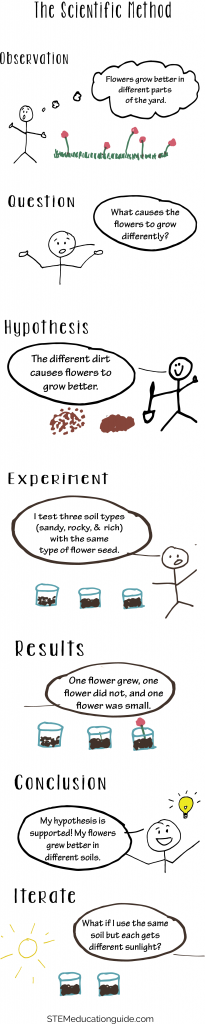
Step 1: Make an Observation
We all notice things occurring around us! This first step of starting your experiment.
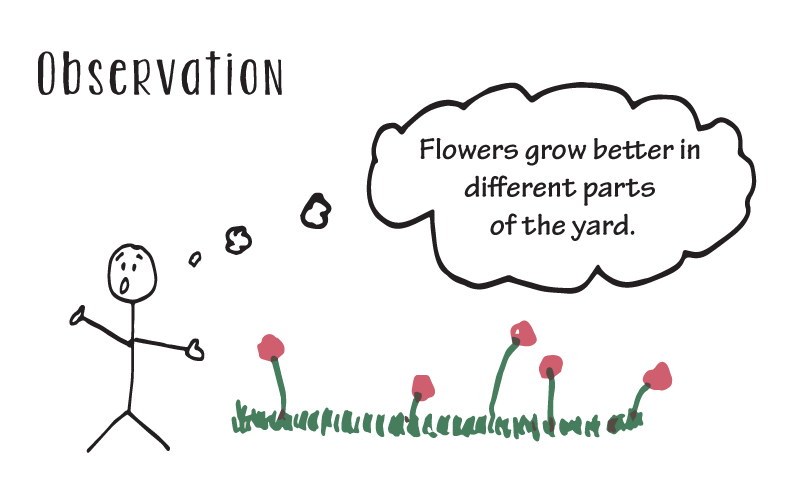
In this example, you notice that the flowers are growing differently around the yard. In some parts of the yard, the flowers are already blossoming! While in other parts, they’re still struggling to grow.
This is also when you may do some initial research. You notice they get different amounts of sunlight and that one area of your yard is much rockier. In this step, record your observations and research.
Step 2: Ask a Question
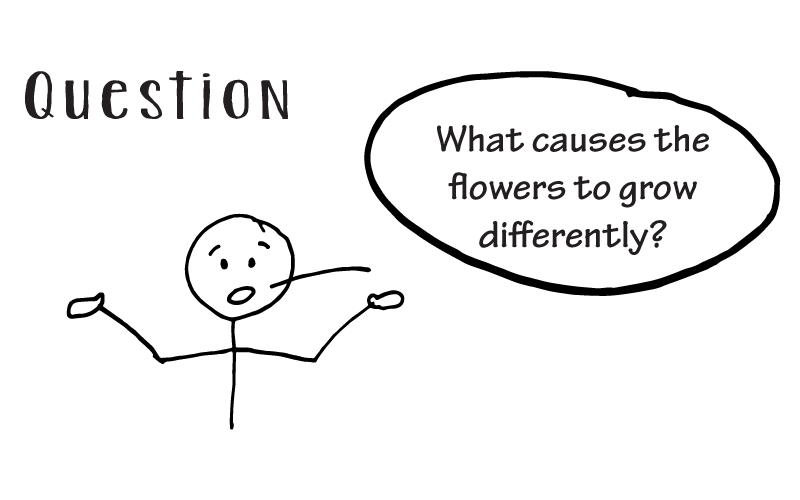
Next, ask your question.
In this experiment, we’re trying to understand why the flowers grow at different rates around the yard. Why are some big and others small?
Step 3: Form a Hypothesis
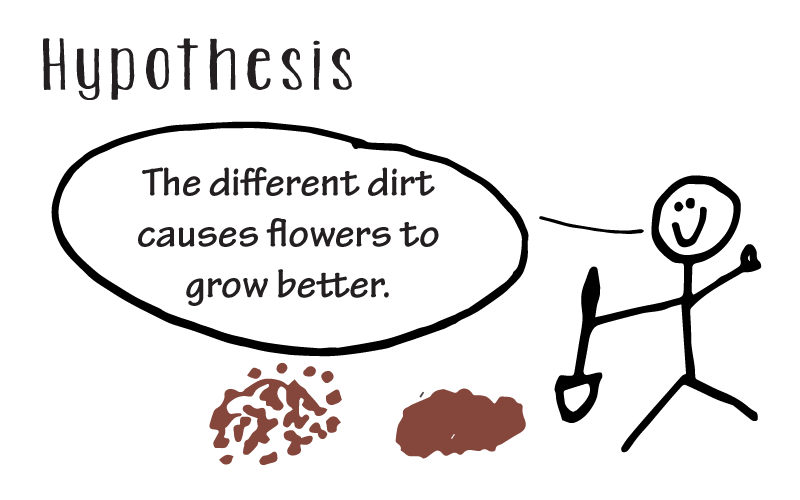
In the next step, you create your hypothesis. A hypothesis is an assumption or idea that you can test in an experiment or study.
It’s important to emphasize that the hypothesis is something you can test.
When creating your hypothesis, use your research and observations to form your assumption.
In this example, you had observed that the soil was very different across the yard. In some places it was very sandy, other places very rocky. You form your hypothesis off this assumption that different soils cause the flowers to grow better.
Step 4: Experiment
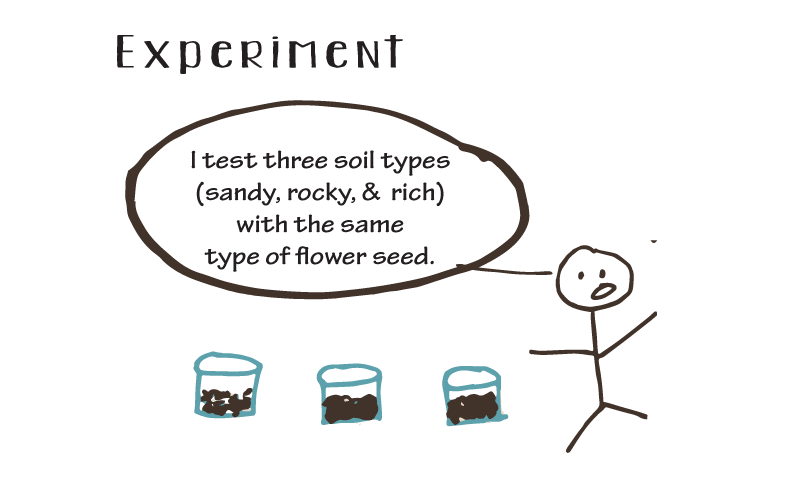
Next, it’s time for your experiment! Use the free worksheet to list each step of your experiment and the materials that you need.
The experiment should be focused on either concluding your hypothesis is true, or it is not.
In this experiment, we decide to fill jars with 3 different types of soil samples collected around the yard. In each jar, we place a seed and then set them in the same place and water them at the same time every day.
For older students, during the experimental step, you can also list your controlled variables. What needs to stay constant in order to test your hypothesis?
In this experiment, water, sun, and the type of seed are our controlled (or constant variables. The dirt is our independent variable – the thing that we are testing.
You can download this great worksheet too on understanding the different variables in a science experiment!
Step 5: Results
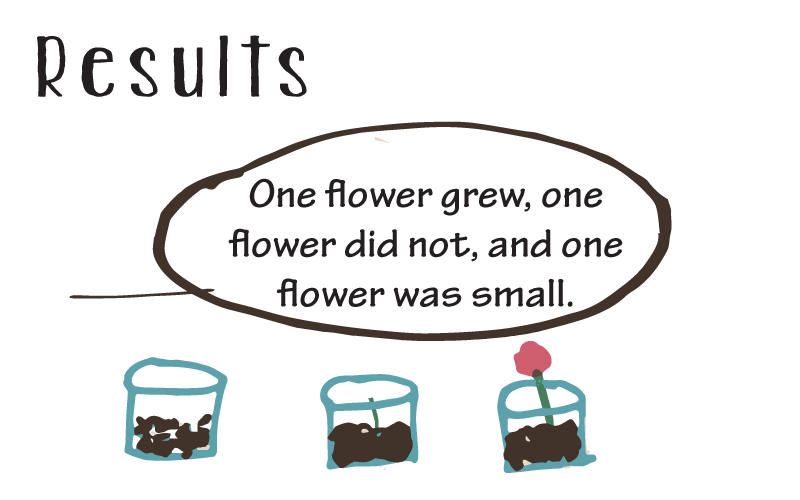
Next, observe and record your results.
In our experiment, we watched the flowers grow and recorded how each flower grew different day to day.
We may want to note which flower sprouted first, which one bloomed first, and which one lived longest.
We make notes about all of our observations and results in our worksheet or notebook.
Step 6: Conclusion
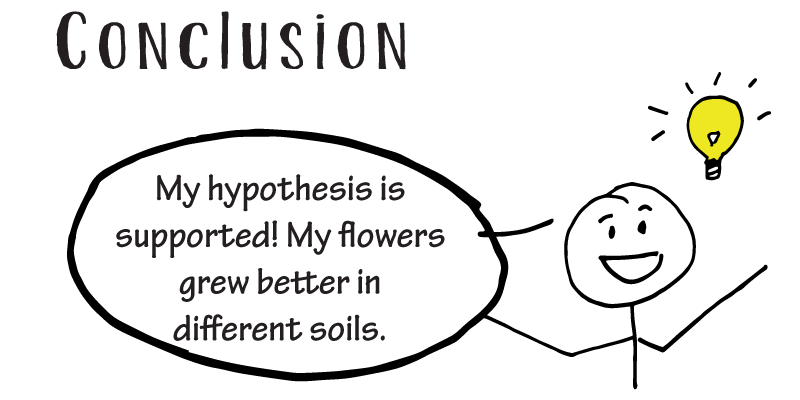
Lastly, use your results and observations to determine if your hypothesis was supported.
A conclusion should center around your hypothesis. Was your hypothesis supported or not supported?
And remember to explain that a wrong hypothesis is not a bad experiment.
It’s important to teach about and avoid research bias. An experiment is about testing a hypothesis, not proving it. An experiment that shows that a hypothesis is not true is just as good as the one that shows a hypothesis is correct!
Step 7: Iterate (Feedback Step)
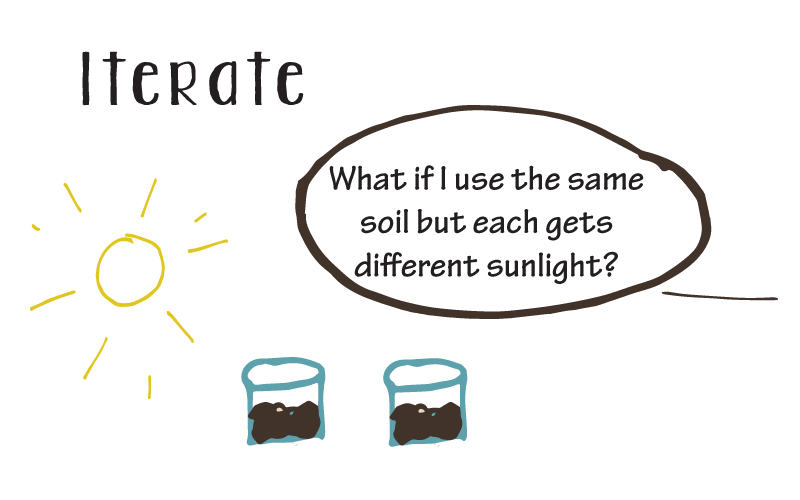
Testing your first hypothesis doesn’t mean your experiment is over!
During your experiment, you may make other observations or want to test other variables. The last step is your feedback step, where you iterate or repeat.
This loops back into the first steps of a new experiment where you make an observation and ask a question, and then start a new experiment using the steps of the scientific method.
Feel free to save or Pin our full example of the scientific method:
History of the Scientific Method
Historically speaking, no specific person can be credited with designing the Scientific Method as we know it today. There isn’t even an “Ultimate Scientific Method” that is the best and most tried system.
Every scientific process works well as long as it starts with curiosity, can be tested through an experiment, and leads to a conclusive observation. It stands as a logical, rational, and problem-solving type of method applicable to a multitude of fields.
That’s not always the fun answer, so let’s take a second to credit those that did historically advance the Scientific Method. The Scientific Method has a rich history that has progressed and evolved from geniuses such as Aristotle, Al-Biruni, and Isaac Newton.
Science was traditionally categorized into an overarching branch mixed with Philosophy and Technology. It wasn’t until the Scientific Revolution that it became its own independent field of study.
The Scientific Revolution started in the 1500s and made immaculate breakthroughs to develop the emergence of modern science.
With the monumental advancements from Enlightenment scientists such as Galileo Galilei, Francis Bacon, and Rene Descartes in changing variables and recording their process.
The scientific method made great gains in the 16th century and 17th centuries. Even then, the “Scientific Method” as a term did not gain much headway until the 20th century, but the design itself was put into words for future generations to expand on.
Wrapping Up Scientific Method
Regardless of the experiment – and countless others to use, some even on this very same website – the importance of the Scientific Method for kids is limitless. When using this structure, you provide your child with the foundation of a logical and rational way to solve any problem.
Science doesn’t always require using safety goggles or a microscope; it can be utilized with anything. If you’re curious and have a question, then apply this method!
Tell you what, how about you use this as an experiment in and of itself. See if your child or children enjoy using the Scientific Method to conduct their own experiments.
Make a hypothesis: Will they enjoy it or not? When you come to the conclusion that they love it and are only benefiting from it, then share those thoughts here with us! Until then, have fun experimenting!


I find your concepts and worksheets relevant to my teaching with respect to STEM education.