For kindergarteners to really develop their STEM skills, they will need the appropriate avenues, activities, and materials to train.
It may be challenging for them to gain this curiosity when adults constantly take away everything for their safety – rightfully so in most cases. However, they still have this sensational urge to experiment and successfully master the vast world around them.
This guide will help Kindergarteners age 4 to 5 years old with an appetite to learn and play while keeping adults feeling secure and understanding that they are gaining the level of knowledge needed to flourish in the 21st century.
Check out our Free eBook with 25 STEM activities for kids. You can download it for free here.
Table of Contents
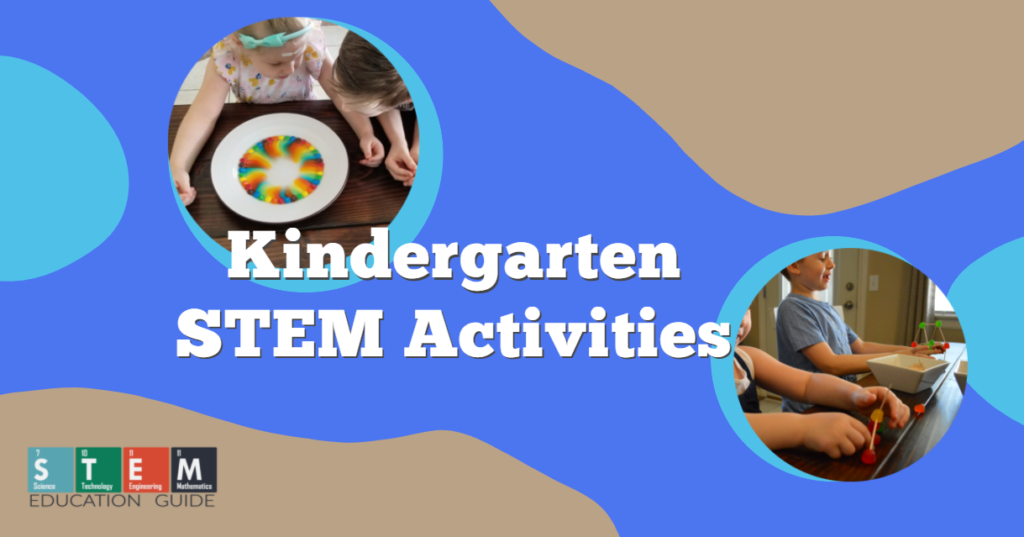
Hands-on Kindergarten STEM Activities
This is a compiled list of activities that can be done with Kindergarteners. It can also be applied to pre-schoolers and/or slightly older levels, but the basis will target Kindergarten. My oldest son (7 years old) also enjoyed the activities with his little sister.
You’ll notice that many subject matters overlap, hence why STEM exists in the first place. Although they are categorized into “Science Experiments” or “Engineering Projects,” feel free to highlight all of the other facets of learning to build on their well-rounded knowledge.
It will attempt to utilize resources and materials typically found around your house and a traditional classroom to be immediately practical. Some of the more unusual items I’ve highlighted with a link so you can find them easily.
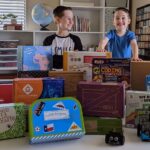
There are tons of STEM science and engineering kits to help take their learning to the next level. We deep dive into the Best STEM Subscriptions Boxes in this article if you want to see what’s offered.
For this article, some are highlighted here, but for the most part, this addresses how they can use on-hand materials to engage in STEM learning.
Kindergarten Science Activities
1. M&M Magic
2. Rain Cloud in a Jar
3. Cleaning Coins
4. Sprout House
M&M Magic
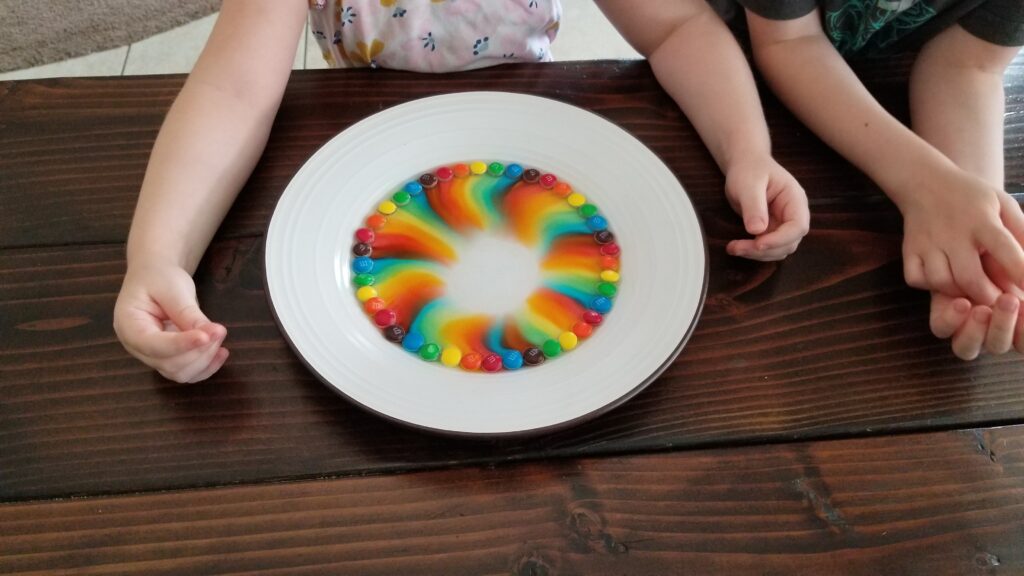
Materials Needed:
- A white plate (Preferably made of glass or porcelain)
- M&Ms
- Cup filled with hot tap water (Not boiling water)
Activity Directions
We’ll start with an easy one.
- Choose which M&Ms you’d like to use! (Feel free to allow them to pick their favorite color or have a specific theme in mind, like red, white, and blue M&Ms for the Fourth of July)
- All you have to is place the M&Ms around the white plate. (The visual results work best when they around the plate, but you can always chunk them into little clusters if you’d prefer)
- Next, simply add the hot water to the plate.
- The fun begins instantly as you get to see the colors, and sugar, dissolve into an illuminating magical color that is a beautiful sight for anyone to see.
M&M Magic STEM Lesson
Aside from the visual beauty that this provides, it is important to note how this is happening. When conducting any of these STEM projects, make sure you highlight the scientific reasoning for what is happening; this really helps build their curiosity.
For this activity, note that the colored sugar coating dissolves in hot water. It transitions from a solid to a liquid that stretches across the plate.
Rain Cloud in a Jar
The “Rain Cloud in a Jar” kindergarten STEM activity is the perfect combination of fun and learning if you intend to teach the water cycle and you’re looking for a quick science project. You get to make it rain in a jar, the quintessential learning activity for Kindergarteners.
Materials Needed:
- A clear jar
- Small cups
- Water
- Food Coloring
- Shaving cream
- Plastic pipettes (or droppers of sorts)
Activity Directions
- In the small cups, mix the food coloring with some water. (Keep to less than half of the cup)
- Fill the clear jar with water until it is about ¾ of the way full.
- Have the pipettes, or droppers, ready in each cup of water. (You only need to use 1 cup of blue if you are teaching about the water cycle, but more colors just add to the fun.)
- Right before you are ready to start the experiment, spray shaving cream at the top of the jar until it is slightly above the top. (This will represent the cloud.)
- Use the pipettes to drop the food coloring onto the top of the shaving cream.
- Watch it trickle down through the “cloud” and drop into the water underneath.
- Feel free to rinse out the jar and start over again using different colors!
Rain Cloud in a Jar STEM Lesson
Clouds are formed when water vapor rises into the air and condenses into tiny particles of dust. When the vapor hits cold air, it turns back into droplets of water.
The tiny drops of water meet billions of other tiny drops to create what we know as clouds. When the clouds get overly condensed and cannot continue to “stick” together, the water falls back down to the Earth as rain.
Also, feel free to take this in any direction you’d like, such as explaining the full water cycle or teaching about specific cloud types. One of the reasons this is such a great kindergarten STEM activity is because there is so much kids can learn about the weather if they are interested.
Regardless, the colors and beauty of their enjoyment will even leave you wanting to repeat this experiment! Have fun!
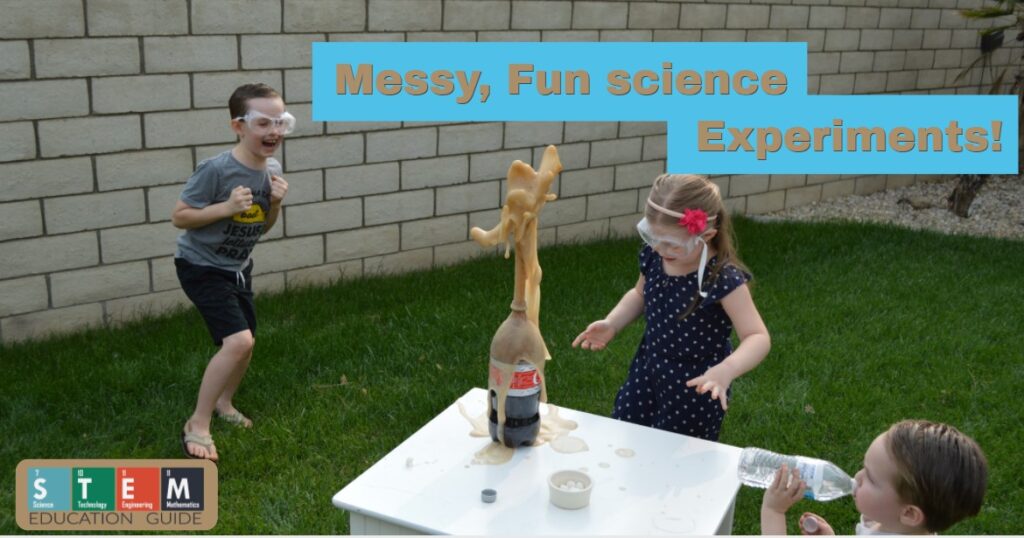
If you are looking for some fun STEM experiments on the messy side, check out our article, Messy STEM Science Experiments for Kids.
Coin Cleaning Experiment
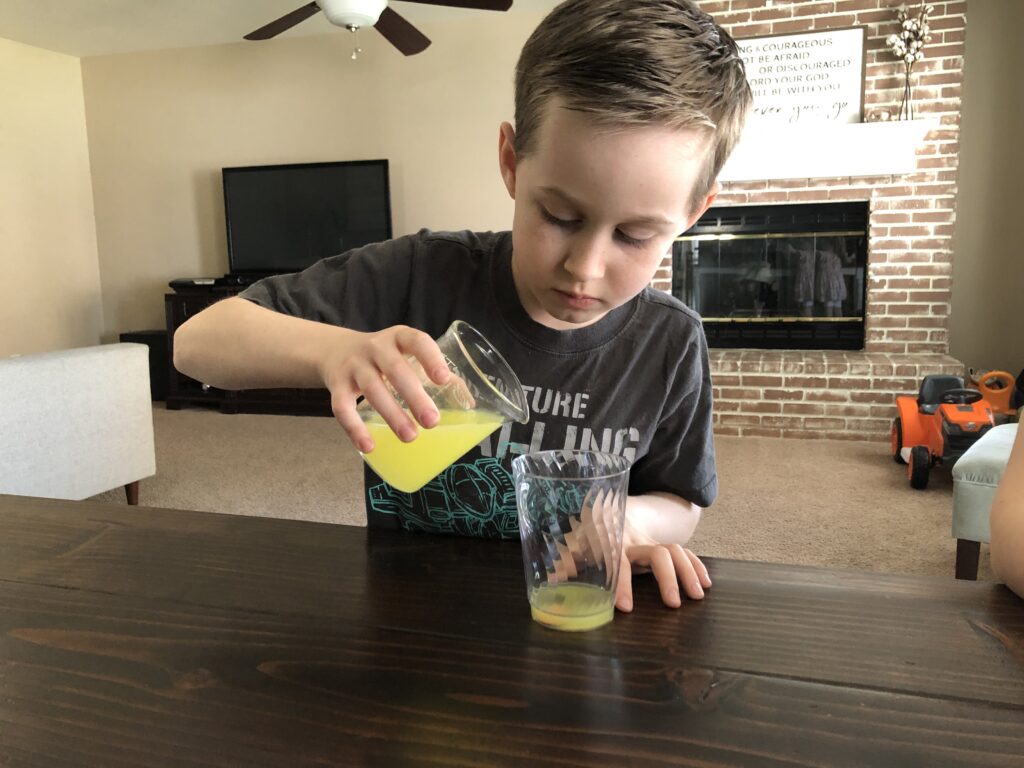
An activity that provides the perfect combination of financial learning mixed with a scientific experiment is the “Cleaning Coin” kindergarten STEM activity.
This experiment is at its best when you test multiple liquids and compare and contrast the results. If you have a lot of spare change lying around and want them to look good as new, this could serve as an added benefit!
Ensure that none of these coins hold any value to you. Cleaning them will definitely make them decrease in value. Other than that, this is a fun science experiment.
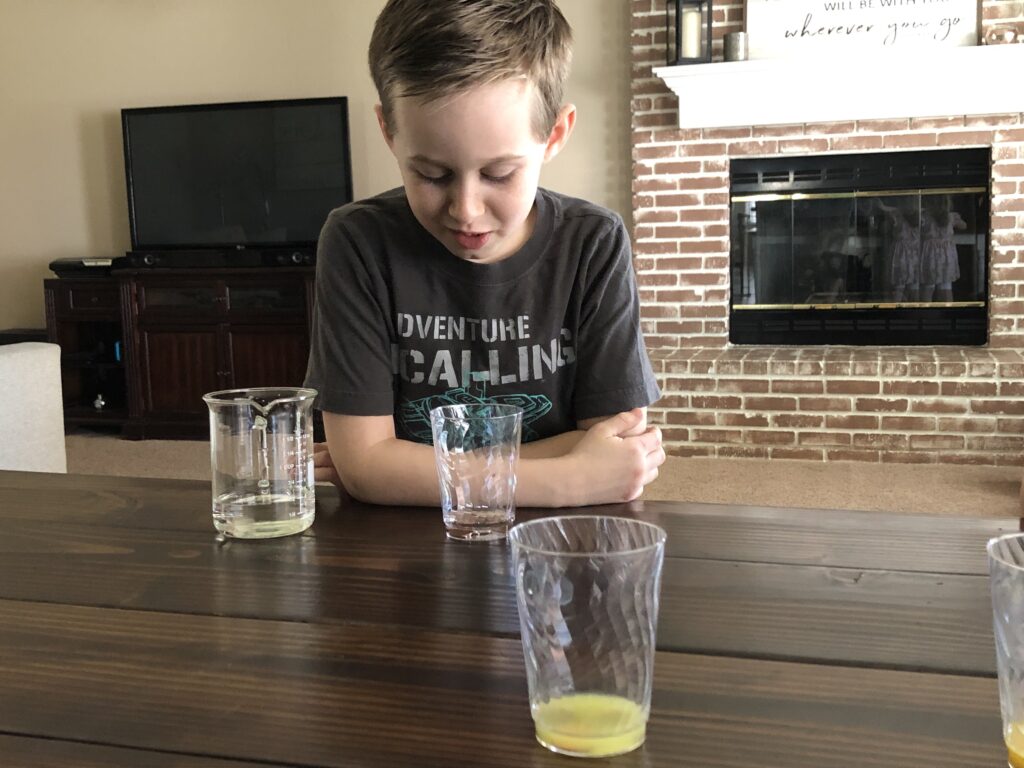
Materials Needed:
- 4 glass cups (Glass cups are encouraged for minimal damage when left overnight – no need for multiple experiments in one!)
- 12-16 pennies
- Water
- Lemonade & Soda
- Vinegar (Feel free to let the kids pick which other liquids to use. You may find them picking silly solutions like Ketchup, milk, or soy sauce, but hey, it’s their experiment!)
- Paper towels & Kids Safety Goggles
Activity Directions
- Place 3-4 coins in each of the 4 small glasses.
- Add one of the liquids to each glass. (Ensure they use their safety goggles; this is the perfect opportunity to teach them the importance of safety with experiments).
- Closely observe the glasses, still with your safety goggles on, to see if they can observe anything happening.
- Trigger cue words like bubbling or how they sounded when it was mixed. Constantly encourage them to make predictions, or a hypothesis, of their own.
- In 24 hours, drain the cups, rinse off the coins, and make your final observations. (Be sure to rinse them to stop the chemical reaction, or you’ll find yourself in a sequel to your first experiment)
Coin Cleaning Experiment STEM Lesson
What did you notice? Why does this happen? The dirt on the coins results from oxidation or the impact of oxygen found in the air we breathe. The oxygen reacts with the penny’s metal and copper, creating the copper oxide.
Copper oxide is the dark dirt-like stain you’ll notice on the coins before cleaning them, which actually serves as a protector from even further damage.
Liquids and materials with high acidity like vinegar, or even ketchup, will break down the copper oxide on the surface of the coin, removing it and leaving them nice and shiny again.
You can even experiment with the different liquids by adding salt or baking soda to the mix to get a true cleaning experience. Baking soda is always handy for a ton of other STEM projects, so it’s nice to have some around.
Please take a look at our article, Acids vs. Bases: Fun Activities to Teach Kids.
Sprout House
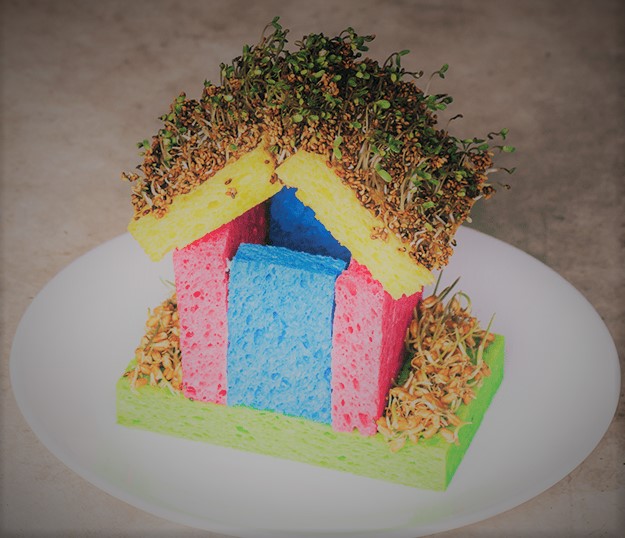
For this Kinder Science STEM project, you’ll be making a small house made of sponges that will germinate seeds.
Not only will it be fun to create on the day of, but it will last you a couple of days to keep a continuous learning cycle for your kids.
Materials Needed:
- 4 sponges
- Scissors & Toothpicks
- Ceramic, glass, or porcelain plate
- Seeds (Wheat berries, chia, or alfalfa seeds work best due to their quick sprout)
- Optional: Hot glue gun if you feel you need the additional support
Activity Directions
- Place a sponge flat on the bottom as the base of the house.
- Insert a toothpick on either side of the base for the walls of the house.
- Insert a toothpick on either side of the base for the walls of the house.
- For the second layer, cut the second sponge in half with the scissors. This will act as the walls of your house. (Be sure to oversee the young children).
- Cut another sponge in half, or in quarters, to connect the dimensions of your walls.
- To hold the walls up, insert two toothpicks in the bottom sponge and at the bottom of the sponges that will act as your walls.
- Keep them about ½ inch spread out to ensure stability, or to simply give the kids another measurement to be made aware of.
- Cut the last sponge in half for the roof. (This is just a simple blueprint. You can construct the house as you please; feel free to give them some creative design responsibilities to the kids. I’m sure you’ll find that they can surprise you!)
- You can utilize the same toothpicks that you inserted to connect the walls to connect to the roof or add more for added stability.
- Still keep the toothpicks about ½ inch apart. (Again, if you feel the need for additional support, a hot-glue gun can be used.)
- Now for the seeds! Typically, if you get seeds specific to this project, they will come with instructions necessary to sprout. Just in case, we’ll give you the basic guidelines you should keep in mind.
- Depending on what you’ve chosen, you can pre-mix the seeds with water to give them a soil-type texture made for easy planting.
- Depending on what you’ve chosen, you can pre-mix the seeds with water to give them a soil-type texture made for easy planting.
- Sprinkle the seeds on top of the bottom sponge and/or roof. These tend to have the best results for germination. (I would avoid the sides unless you want to compare and utilize this as another learning experience)
- Lightly water the seeds! For the base, it sometimes helps to simply water the base of the plate. As for the roof, try to keep the water at a minimum. (Using a spray bottle tends to work perfectly for this.)
- Place them by the sun, on a windowsill preferably, and wait for them to grow! Check back every 24 hours!
Sprout House STEM Lesson
This all sounds very fun, mostly because it is a fun STEM project! However, make sure you are talking to the kids about the scientific process behind what you are doing, especially when you start to plant and water the seeds.
First, you’ll want to address the need for the right growing conditions. This includes placing them in the appropriate room temperature around 70 degrees, giving the seeds consistent moisture, and the importance of location for the house to receive sunlight.
You could even place a plastic container over the top of it to produce a “greenhouse” effect.
Next, you’ll want to discuss the growing process itself. The first thing seeds do is break out of their protective layer called the “seed coat.” After that, germination begins, or the process of the seed beginning to grow a stem.
Eventually, they will be going through the photosynthesis process, in which organisms (seeds) use the sunlight as light energy and convert it into chemical energy that fuels the plant’s growth. It basically creates its own food from the nutrients provided to it.
Also, in true STEM fashion, feel free to use this as an opportunity to teach about the engineering and mathematics that went into the construction of the Sprout House itself. Kindergarten STEM activities are a great path to learning more about these science experiments.
Have them reflect on what they did well, why they did it, and what they would do differently in another house. I would’ve noted this earlier, but I want them to reflect based on how well the seeds have germinated.
Lastly, be sure to have them keep track of which side is growing and describe why. Sure, it could be an engineering malfunction, but most likely, it will be due to lack of moisture build-up or lack of sunlight.
With this, you can highlight the importance of the “greenhouse” effect or simply adapt as the days go one. The final result should be a beautiful growth of plants over a house-like structure! Good luck!
Kindergarten Technology Activities
There are a bunch of great apps and technology resources out there. However, I wanted to highlight some that still kept the Kindergarteners operating with their hands and using the technology as a supplement. We can still find a STEM challenge or two without a screen.
Stop-Motion Animation Video
Materials Needed:
- Tablet or smartphone (If you have a camera, then even better, but any of these devices should work fine – be prepared to have data storage or get ready to delete as you go.)
- Foam or a drapery fabric as the background.
- Collection of objects for your film (this can be a fun scavenger hunt with your kids). I made a free downloadable one for you below.
- Storyline/Plot (Give them a lot of control and freedom with this if you’d like. They’ll love it!)
- Stop Motion Animation App (Could use another film app like iMovie or Horizon Camera)
Activity Directions
- Take a picture of a still object.
- Slightly move the picture and take another picture.
- Repeat this step hundreds or thousands of times (depending on how long you want the movie to be.)
- Sync the pictures to the app and started creating using the apps. (They will guide you through the process.)
Stop-Motion STEM Lesson
This kindergarten STEM activity is the perfect combination of creative autonomy mixed with a mechanical understanding of movie-making.
Kids love to use their imagination to create stories as it is, so this gives them a platform to see their story come to fruition. This gets them comfortable using technology in a guided manner for them to see.
They can also collaborate to create a beautiful story while simply playing with some of the objects between frames.
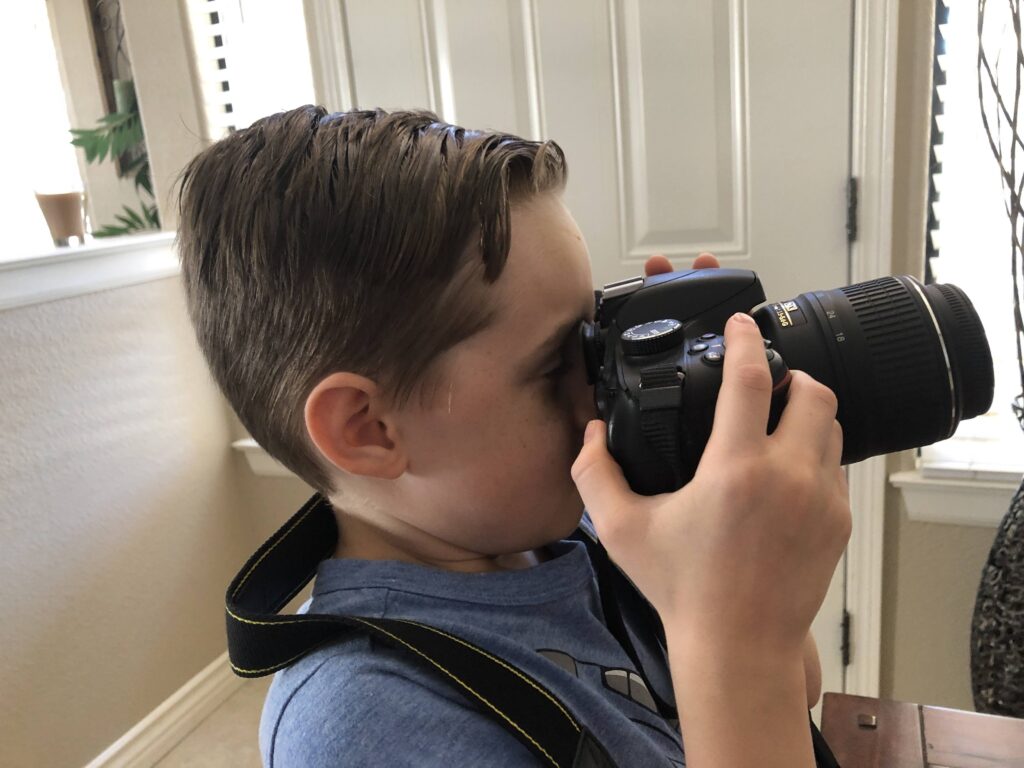
STEM Photo Hunt Activity
Materials Needed:
- Digital Camera or phone camera
- A scavenger hunt
Activity Directions
- Create a scavenger hunt for your Kindergartener to explore and take pictures of! (Or you can use the one I already prepared for you.)
- The created versions are best as you can tier it towards the students. It could be as simple as finding every color in the rainbow or finding an object with a variety of specific shapes.
- Then, they are off to explore their surroundings, whether it be a classroom or a playground, to capture their intended target.
STEM Photo Hunt Activity Lesson
I know some of us are still a little skeptical about letting our kids run free with an expensive camera, so use your adult-like logic for how far you want to go with this.
On the flip side, they’re going to get their hands on them eventually. It’s best to teach them how to use the camera feature appropriately!
This lets them observe and document using technology at their hands and doesn’t leave them glued to the couch. You may even find yourself looking at certain objects with a bit more curiosity.
Kindergarten Engineering Activities
Flashcard Lego Challenge
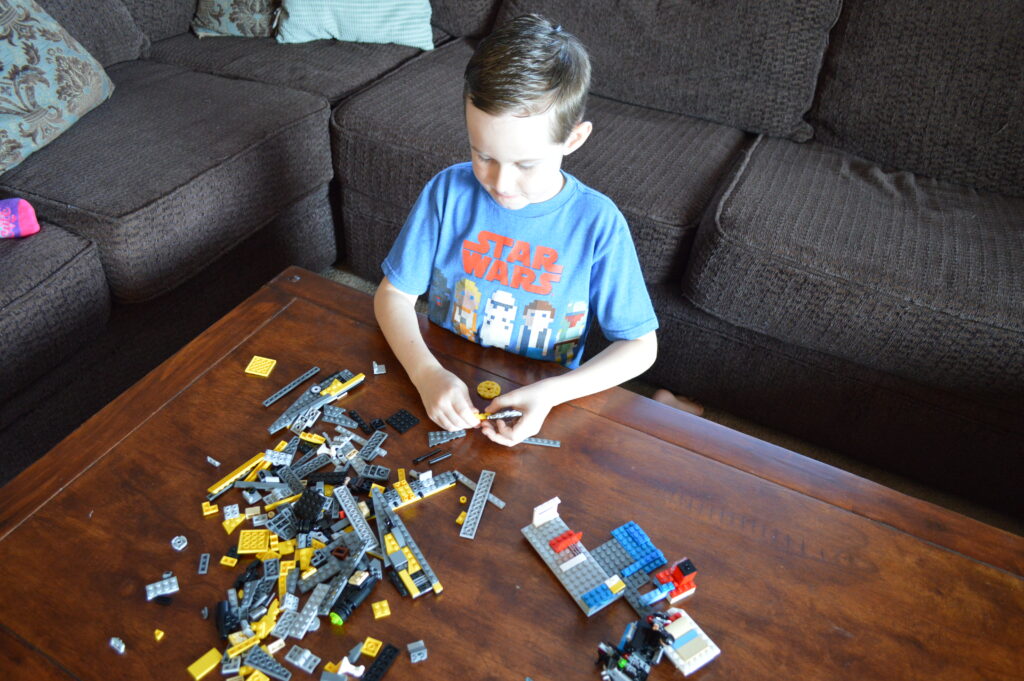
Materials Needed:
- Legos (Or Duplos, which are bigger and easier to construct things out of.)
- Lots of Legos (You want them to have plenty of options.)
- Flashcards for sight words (This could be a classroom set of animals, dinosaurs, different categories of food, or whatever you’d like.)
Activity Directions
- These directions are easy and self-explanatory. Let them know this will be a challenge.
- Show them a word from a flashcard. You can filter out some of the more difficult words if you’d like or just skip them as they come.
- Task them with designing the word. You’ll be impressed with what they can make.
Flashcard Lego Challenge STEM Lesson
Legos are simply one of the best creations for any developing mind to utilize their scientific and engineering skills.
They are constantly developing critical thinking skills to identify which pieces would work from the color to the item’s basic outline. Even if they find difficulty building something or their structure falls over, it can be used as a teachable moment to overcome new challenges.
Chances are, if you have legos, you also might have specific instructions for a design that is a bit more complex and will take more time, never underestimate the value of legos!
Gum Drop Bridge
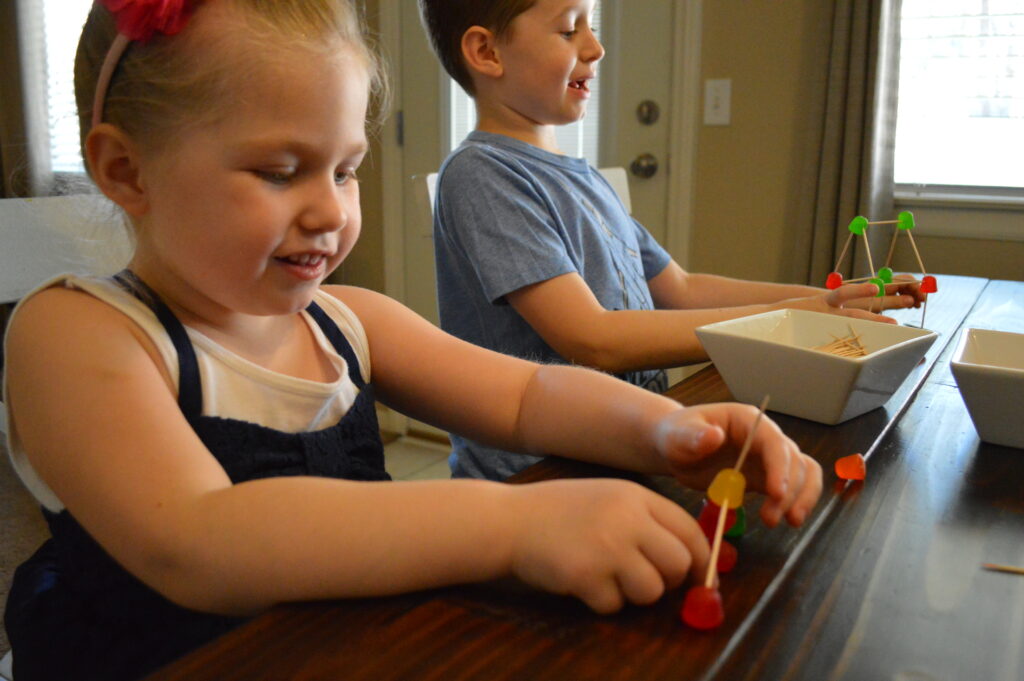
This will help build your kids’ engineering skills with items you probably have in your house already. Constructing with small candy pieces will help with their fine motor skills.
Materials Needed:
- Gumdrops (You can substitute for any type of suitable candy including marshmallows or jellybeans.)
- Toothpicks
Activity Directions:
- Start by gaining confidence in the young learner by creating something simple such as a square or a triangle. (You can repeat this as often as you’d like or have them build what they’d like.)
- Have them build on those previous shapes by connecting one square or triangle to another square or triangle using toothpicks. You can refortify by adding additional toothpicks.
- Turn this into a game by having a toy cross something like a lego crossing from table to table.
- You can expand this into building a tower or a building of sorts. (Experiment as you’d like!)
Gum Drop Bridge STEM Lesson
The design and blueprint of a bridge are monumental in creating a formidable structure.
This engineering contract can be expanded as you see all sorts of structures in lessons or when traveling. Start exposing them to the different types of bridges they can create or observe, including beam bridges, suspension bridges, or arched bridges.
This can gauge their curiosity for the stability of buildings and structures worldwide that they will be exposed to. I hope you’re prepared for all of their questions and suggestions!
Cup Tower Challenge
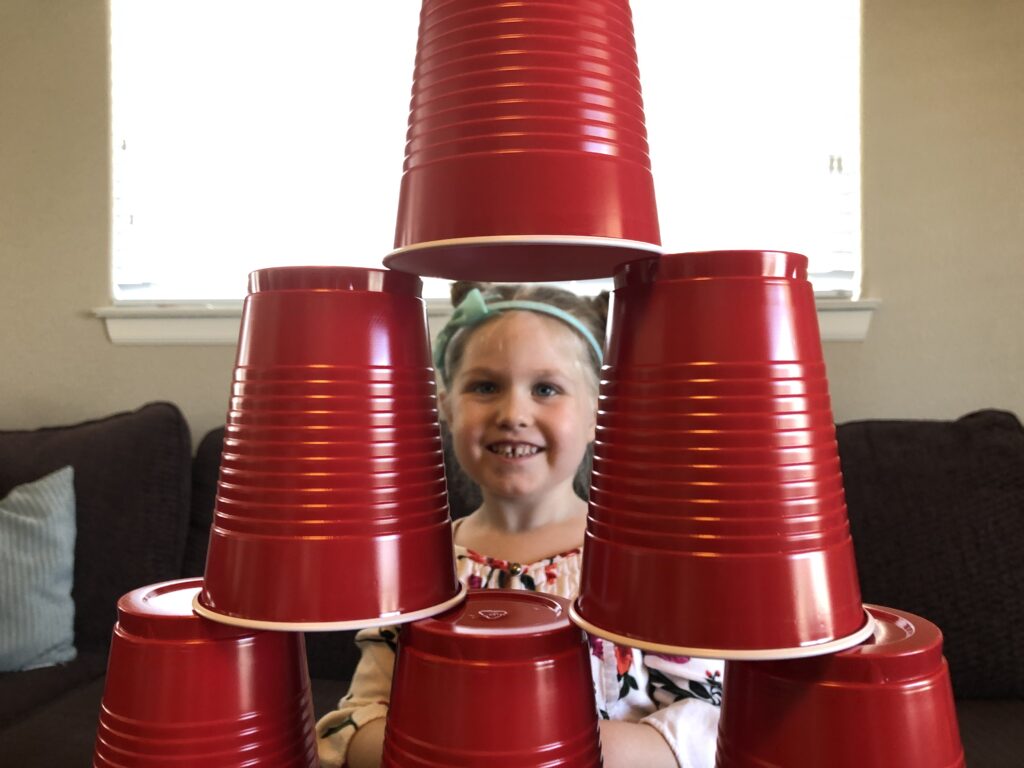
If you don’t want a mess around, this kindergarten STEM activity is great—only some cups to clean up.
This one is a classic science experiment too. Kindergartners love stacking cups up as high as they can, then knocking them down.
What’s great about the Cup Tower Challenge is it will scale for older kids. It can be challenging for very young kids but, keep it simple for them.
Materials Needed:
- Cheap plastic cups. Disposable or Nerf cups that come with the toys.
- Playing cards, popsicle stick, or whatever is easy stackable.
Activity Directions
Let your kids’ imagination run with this activity. If you have a few kids playing together, challenge them on who can slack cups up the highest?
- Can they stack the cups in a circle around them?
- Can they stack them up to the kitchen counter?
- Can they stack them to their height?
Cup Tower Challenge STEM Lesson
It’s a great sign if your kids are curious about structures and buildings. Engineering is one of the backbones of STEM and solving STEM challenges. Engineering leads to enthusiasm about mathematics and technology.
For smaller kids, have them count the cups. Ask them how many cups they think are needed to make the structure taller or wider.
Kindergarten Math Activities
Sticky Note Number Match
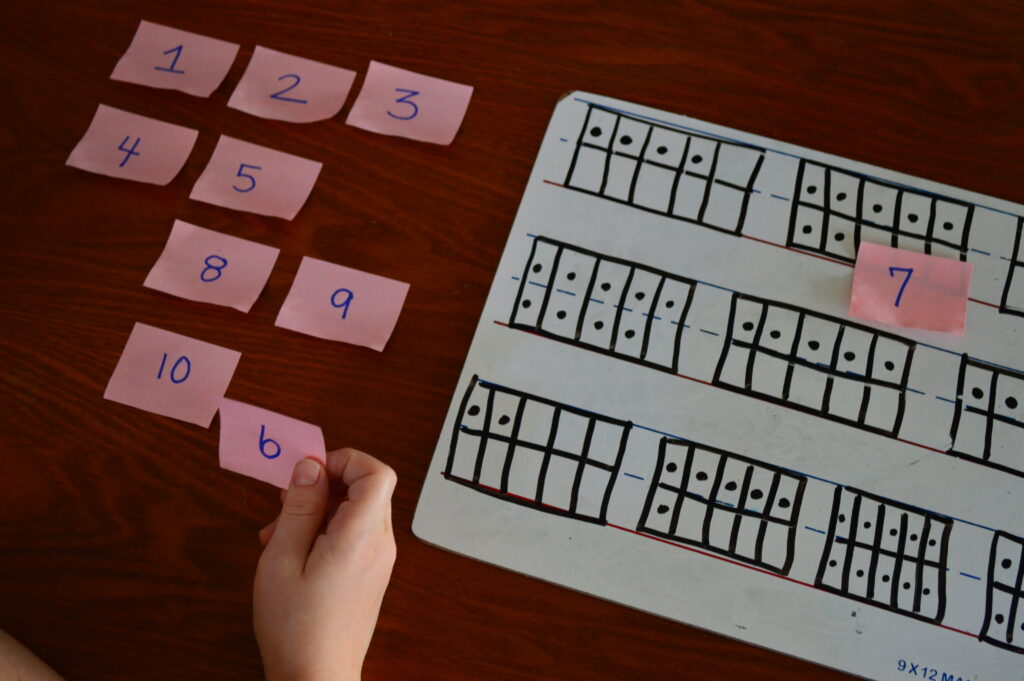
Materials Needed:
- White sheet of paper
- Sticky notes
- Marker
Activity Directions
- Write down the numerical value in “dot quantities” throughout the white paper (You can choose dots, stars, or whatever shape you’d prefer.)
- Tape the dotted white-sheet of paper to a wall.
- Write the corresponding numerical digits of the number on sticky notes.
- Have them match the sticky note to the appropriate location on the piece of paper.
Sticky Note Number Match STEM Lesson
Kids learn best when they are actively moving around and not simply memorizing numbers to complete on a worksheet.
Although that serves its purpose, sometimes, this activity is great to get them moving and focusing on transferring the quantitative value.
You can expand this by posting multiple pieces of paper throughout the house or utilizing different items for them to match, like math facts, shapes, or colors.
Lego Math Challenge Game
Materials Needed:
- Math Challenge Cards. Plenty can be purchased online, or you can simply create your own set of flashcards.
- Legos (I told you these were valuable.)
Activity Directions
- After creating or printing out the cards, pick them at random, and they’ll take it from there!
- You can add cards as you please as they grow and include fractions or multiplication problems.
- Please provide them with assistance when needed.
Lego Math Challenge Game STEM Lesson
The value of legos strikes again! When working with these flashcards, they understand the value of grouping, which naturally builds their knowledge of traditional mathematical concepts, including addition, subtraction, estimation, fractions, and numerical value.
It gets them moving and building while associating mathematical concepts, you can’t go wrong!
Why Is STEM Important?
I know I’ve written about STEM’s importance, but I want to reiterate it here again. If you want to read my full thoughts, I cover it in detail here, The Importance of STEM in Childhood Education. This will be a quick summary of that article.
Science, Technology, Engineering, and Science (STEM), when provided to students at an early developmental stage, is crucial to their overall growth and development.
The integration of these seemingly rigorous academic disciplines becomes fun and engaging, leaving kids curious to expand on these from a foundational period.
Their critical thinking skills, creativity, problem-solving, and engineering are heightened when their minds are most prone to absorbing knowledge.
The relevancy of STEM activities heightens an individual’s real-life problem-solving skills. Most of these activities involve hands-on experimental learning, so get ready to participate in some active learning!
Wrapping Up
These are some of the best kindergarten STEM activities in every category that we’ve found for kindergarteners aged 4 to 5 years old. Make sure to check out our eBook at the top of this article, with a lot more for you and your kids.
If you have some fun ideas kindergarteners will enjoy, let us all know down in the comments!