
The mBot Neo is a great way to enhance your child’s hands-on concentration, logical thinking, and creativity.
Learning a valuable skill like coding will increase opportunities, especially for children. It’s a fact coding is the way of the future; it’s going to be as necessary as learning to read.
The great thing about it, learning to code can be fun!
I’m a big fan of coding robots. I’ve seen my son learn to put robots together, then use them while learning to code.
In this review of the Makeblock mBot Neo, I’ll get into how to set the robot up, using mBot, and a comparison of other coding robots.
I encourage you to read my review of mBot Neo, but if you’re short on time and like to get more information, you can see this robot right here.
Also, Makeblock added a new robot to their line with the Makeblock mBot2 Rover Robotics Kit. This is an add-on to mBot Neo (now named mBot2). I’ll have a review of this robot soon!
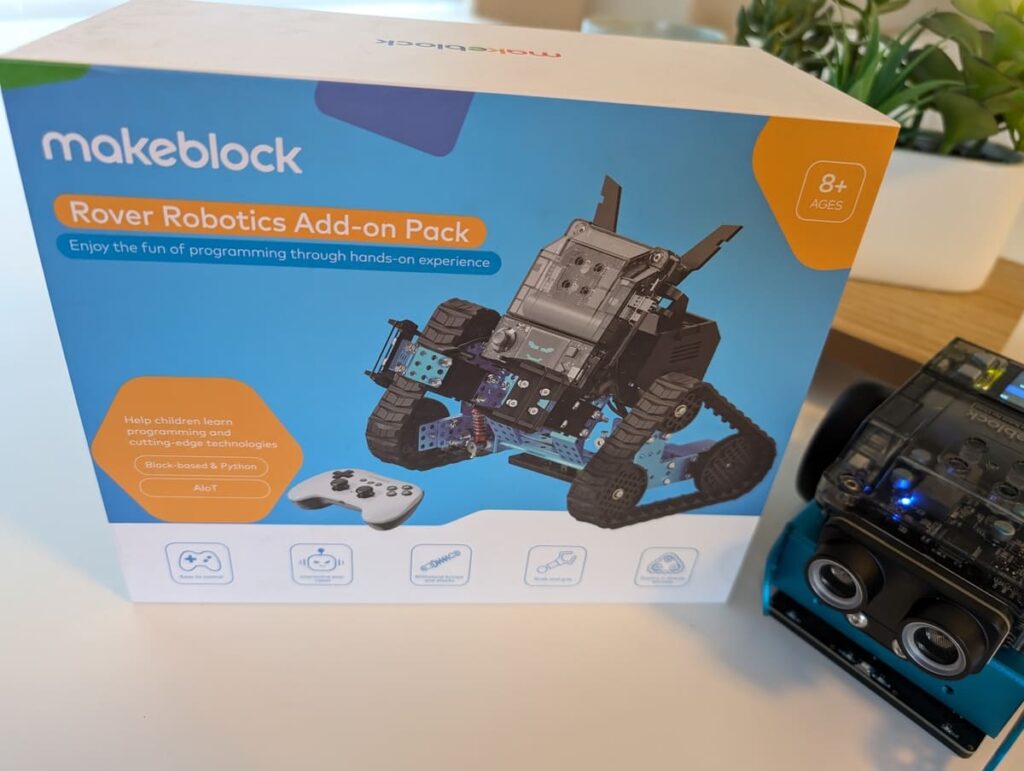
Table of Contents
What is Makeblock mBot Neo
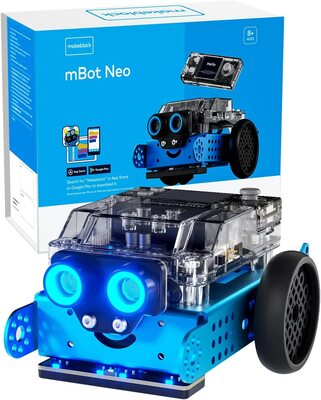
The mBot Neo is an interactive learning and educational coding robot.
It is designed to carry out interactive and innovative learning that is engaging, fun, and reflects real-world application with cutting-edge technologies.
Makeblock has quite a few coding robots available. You can find them all here. So why did Makeblock produce another robot?
mBot is really their next generation. They took everything they’ve learned and applied that knowledge to mBot. Not only that, they brought the price down without sacrificing the quality, streamlining it for their fans.
How To Put mBot Neo Together
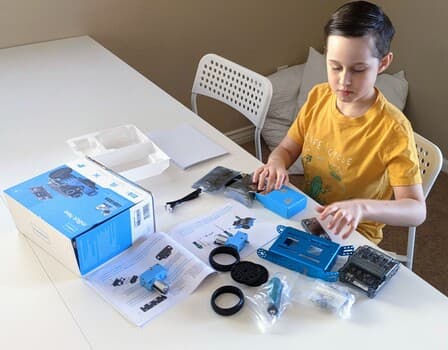
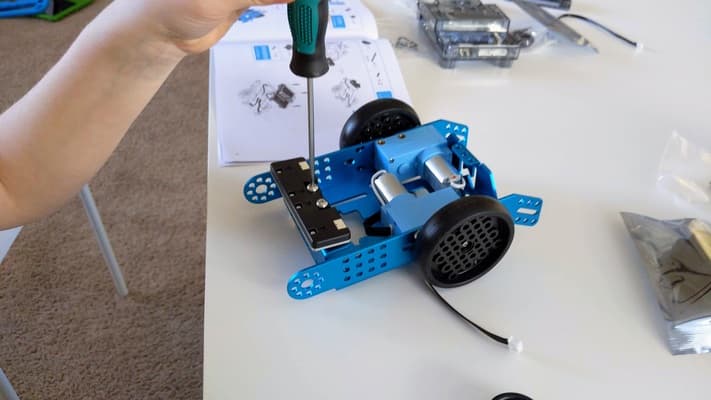
After we unpacked everything and laid it across the table, we looked at the instructions. The instructions were clear, and we primarily relied on the assembly pictures.
Every step had a picture to go along with it. My son had no problem putting mBot together.
My son and I both commented on how sturdy mBot felt. The main frame is made out of aluminum. Most of the robots we’ve put together are made out of plastic, which is fine, but mBot is on another level when it comes to material quality. Even the plastic pieces are thick, and feel strong.
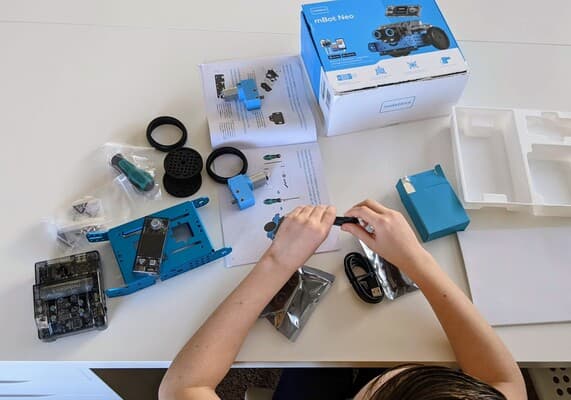
Something I always like to see is tools included. Everything is there, and the screwdriver isn’t some cheap, one-dollar tool. This is going in the toolbox!
All the screws were labeled, with some extras included, just in case.
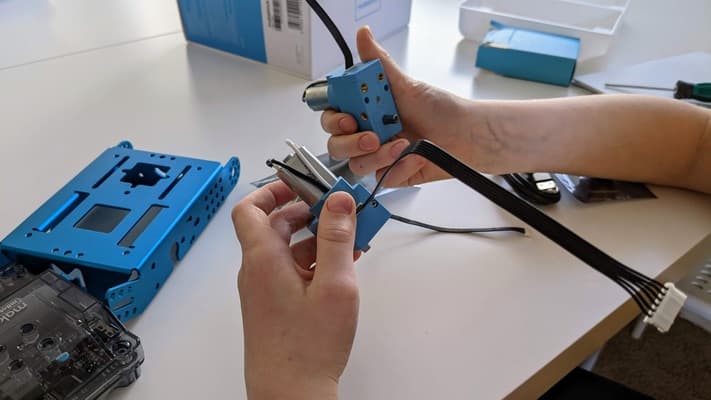
The above picture is of the two motors—one for each wheel. Notice the wires that attach; they only go one way, so you can’t mix it up. I know because I tried the wrong way first and wondered why the wire connecter wasn’t clicked in.
The wire will need to be fed a certain way. This is shown in the instructions, but if you feed it wrong, there is enough space to fish it out and feed the wire in the correct location.
It only took around 15 to 20 minutes to put mBot together. We took our time for the most part. Overall, I’d say it’s easy to assemble, and an eight-year-old will have no problem without a parent’s help.
How To Use mBot Neo
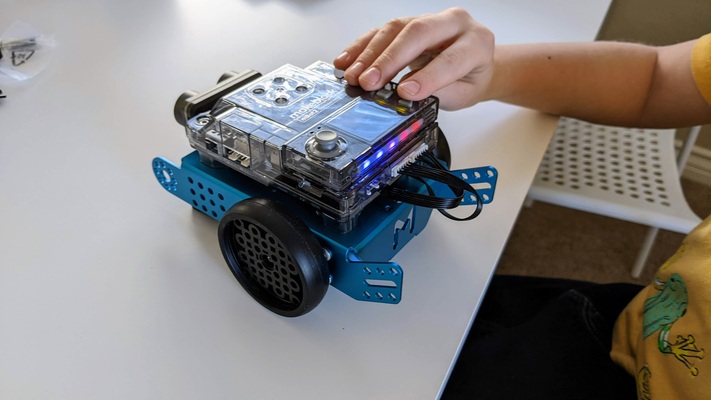
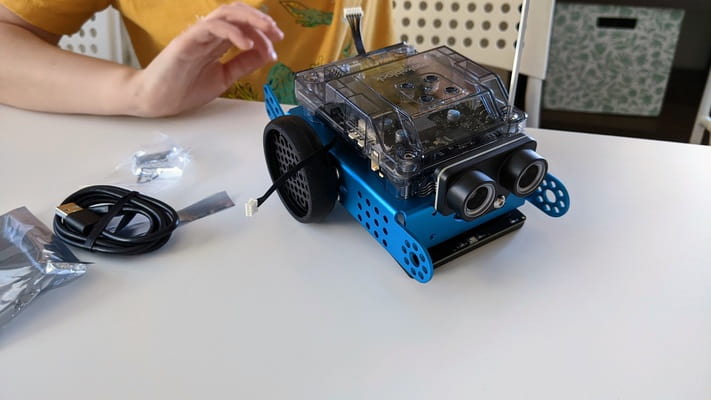
The battery was charged out of the box, and mBot was turned on with a click of a button. You’ll notice the controller on top of it. There is a port on the bottom that clicks on the robot.
You’ll want to download the MakerBlock app for your smartphone or tablet to set up and start using mBot Neo.
Do note: Download the correct app. I accidentally download a different app from MakerBlock. This was for a different robot they offer, and we weren’t getting the full function of mBot Neo. You’ll know you found the correct app because there is a picture of mBot.
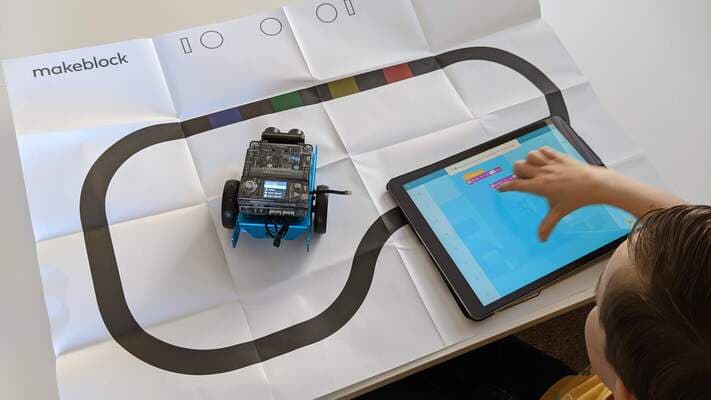
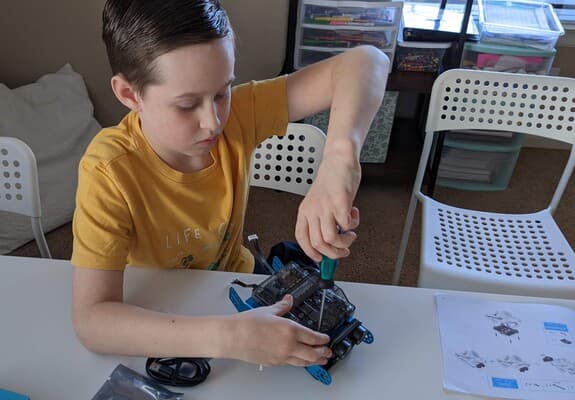
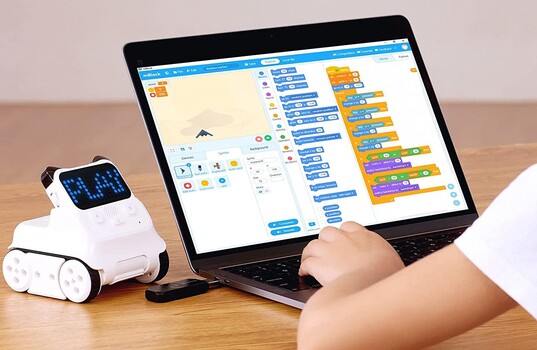
There are a few demo modes to get a feel of what your robot can do. In the picture above, my son is using Scratch programming language to set up a routine for mBot to follow. This is basically moving blocks on the screen and changing commands. Move forward, stop, turn right, stop, make a sound, move forward. You get the ideal!
Scratch is an excellent programing language to start with, as it’s all visual. When someone feels comfortable with that, you’ll then move on to python, which you’ll have a feel for already, but it’s not moving blocks; it’s writing the commands in text.
This is just barely scratching the surface of what mBot Neo can do. The robot has full gyro controls, ultrasonic sensors, and full voice commands are supported.
To see everything mBot Neo can do and get a closer look, you can check out this page here.
How Does mBot Neo Compare to Other Coding Robots
mBot Neo compares well with other coding robots available. The two closest comparisons I can make after my kids try them out are the Sphero BOLT and Clicbot.
Sphero BOLT
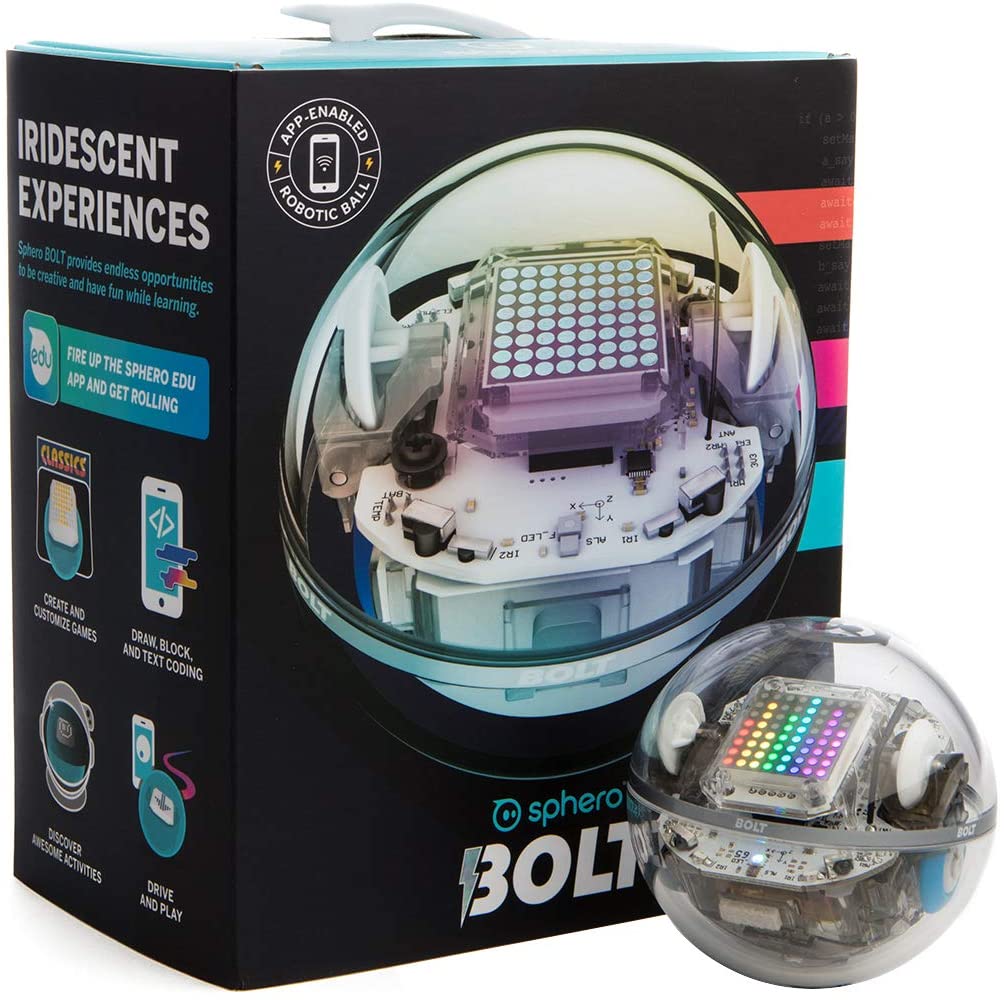
The Sphero BOLT is a lot like the mBot, but you won’t be putting it together. Your kids won’t get the satisfaction of assembling the Sphero BOLT; depending on what your kids want from their robot, this might be a big deal.
- Learn JavaScript, Scratch & Swift.
- Programmable Sensors + LED Matrix makes the robots look interesting.
- Program with the Sphero app on a smart device (iPad, iPhone, and Android).
Overall, Sphero makes good learning and coding robots for kids. The biggest downside, when compared to mBot, is the price. It costs double what mBot Neo is.
You can find more information is see the Spero BOLT here.
Clicbot

I absolutely love Clicbot! It’s a perfect coding robot for all ages. My nine-year-old son still uses it.
- The best coding robot. There’s no way around this, but it comes at a steep price.
- Tons of activities and a massive community with a lot of community-driven projects.
There’s a lot to say about Clicbot in this comparison, but if you’re interested, I encourage you to check out my full review of Clicbot here.
Clicbot is modular, meaning you can configure it in tons of ways, hundreds of different configurations. In my review, my son even attached the suction cups (motorized) to climb on our glass window.
The biggest downside is the price. You get a lot with Clicbot, but I feel more parents will be hesitant to spend so much on a coding robot. This is where the value of mBot Neo really shines! Maybe see if your kids like a more basic robot like mBot, then move to Clicbot.
You can find the current price of Clicbot here.
How To Use mBot Neo in the Classroom
With a few of these in a classroom, they can be reassembled by many students. Since the app is easy to set up, the robot is quickly picked up so they can use it immediately.
- Let your students explore how the robots work first. They can find out how to make it tick with a small demo.
- In small groups, have them disable (from the class before) and reassemble mBot. After disabling the robot, they should be able to put it back together is ease.
- Let them fail if need be. The robot is intuitive; some fiddling around with it will have them devise new ways of using it.
Coding robots in the classroom is a fun and exciting way of capturing their attention!
Do I Have To Have a Coding Robot To Learn To Code
No, you don’t have to have a coding robot, but having one increases the chance of sparking interest in technology. We have a ton of resources about coding here. Some are free, like Scratch coding language, but that will only get you so far.
You can also check out our article about how long it takes kids to learn to code.
How Much Does mBot Neo Cost
mBot Neo is a value coding robot, and there’s a lot of value that you’ll receive with it. As of right now (I’ll do my best to keep this article up to date), it’s under one hundred dollars.
This is in line with my family’s other robots, but I think mBot Neo packs a lot in for that price.
You can see the current, up-to-date price here.
Makeblock Other Robots and Learning Toys
Now that we’ve covered Neo, let’s look at some other robots from Makeblock.
First up is an add-on to mBot2, formally named mBot Neo.
You don’t have to have these for mBot Neo, now called mBot2, but these are great once your kids want extra functionality with their robot.
My son wanted to see how far he could go with mBot2, so we decided on mBot2 Rover.
What is mBot2 Rover
This is an add-on that will use some parts from mBot2. Nothing will be destroyed, and you can reassemble mBot2 whenever you like, but the Rover will use some parts. So, mBot2 is needed.
What Does mBot2 Rover Add
More Terrains: The two-track system allows you to go outside or set up obstacles. mBot2 goes over carpet or tile easily, but it can’t take it on too many surfaces that aren’t flat.
Varied Gameplay: mBot2 Rover can move and rotate precisely at the distance and angle you specify. The robot can spin its track wheels precisely, one track moving forward and the other backward, which means it can do a 180 in the same place.
Added Life: Your kids will get more life out of there robot, use the same programs, and continue on where they left off with more learning and fun!
mBot2 Rover extends the life of your robot, figuratively and literally. It’s more robust, so they won’t be scared of letting their small siblings use their robot 🙂
mBot2 Rover Assembly Instructions

Since you’ll need parts from mBot2, it’s good to have it handy. We kept the robot on the desk with us. I recommend doing this and not tearing apart mBot2. Not all parts are needed, so just grab as required in the assembly instructions.

The booklet that comes with it is clear and has colored instructions. I expected this as this is the same with all of Makeblock items. I also bought their laser cutter, which came in pristine packaging and with instructions.
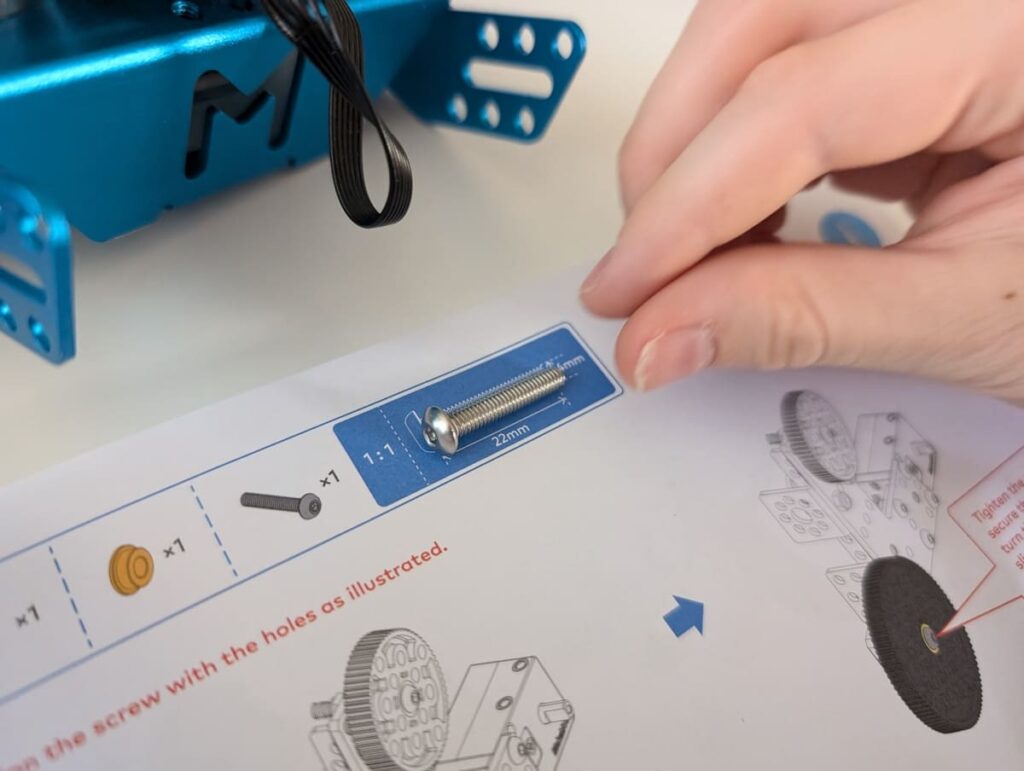
To show how clear the instructions are, the assembly kit comes with multiple-size screws and bolts. On each page, when it’s needed, they have a size chart to make sure you grab the right one.
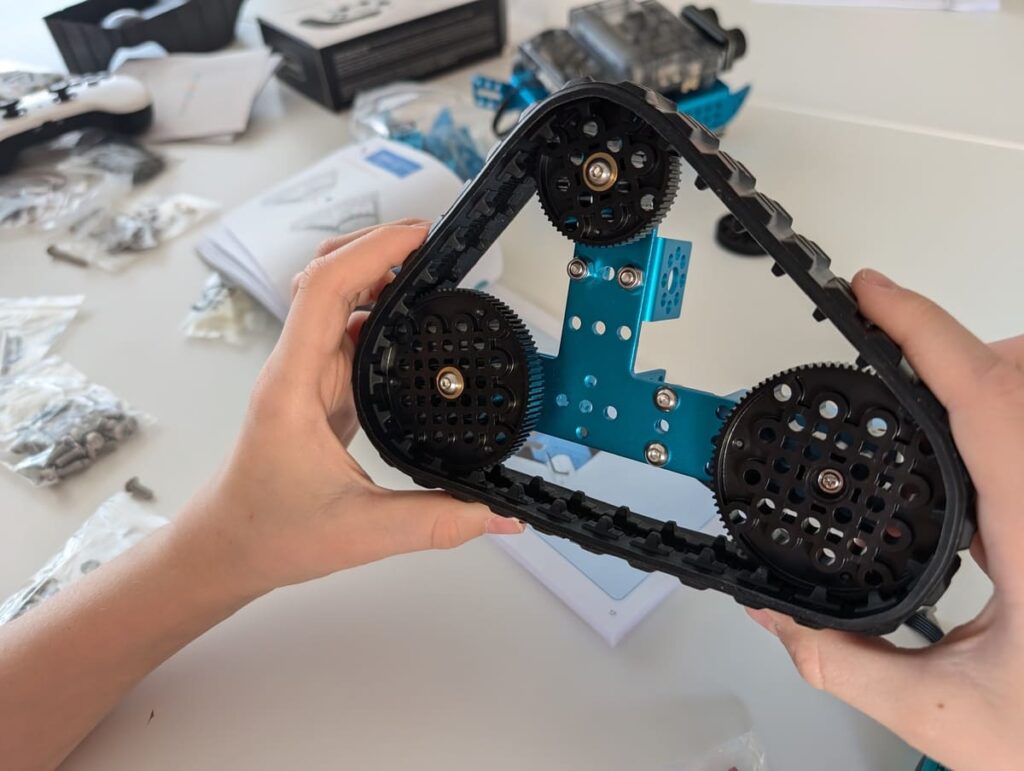
This is the first wheel track on the mBot Rover. You’re going to make two of these, so they mirror each other. It looks like it will be tight getting the rubber track on, but it’s flexible enough to get over the three wheels.


There are six of these little springs for the suspension. They help your robot move over objects and turn. It’s clever how that add these because it holds the lower cross beam together and attach to the frame.


Makeblock MBot Mega Robot Car Kit
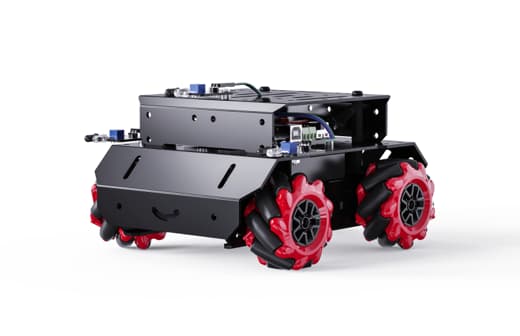
This is a lot like Neo in our review but with a few key differences. All four-wheel can move independently and are more rugged. You can use this robot outside as it’s taller, and the wheels will have more grip.
You’ll need a Raspberry Pi or Arduino IDE computer board. This is another benefit of Neo, as the board came with the kit.
If you’re looking to tinker around more and have more access to the computer board, then you should look into this mBot Mega Robot Car kit.
You can check the availability of the Makeblock mBot Mega Robot Car Kit here.
Makeblock mBot Ultimate 10-in-1 Coding Robot

Makeblock calls it ultimate for a reason! This kit comes with over 400 pieces and is compatible with Arduino and Raspberry Pi. These computer boards aren’t required but will enhance your experience with the robot.

You can see from the picture above all the configurations mBot Ultimate can be made into. This review and guide are about mBot Neo, but if you love robots and get bored quickly, then definitely take a closer look at this ultimate coding robot!
You can see the current price of the Makeblock mBot Ultimate 10-in-1 Coding Robot here.
Makeblock Codey Rocky Robot
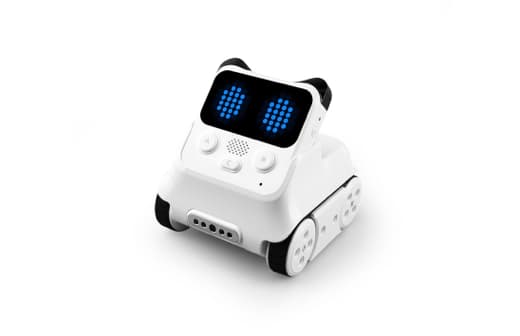
Makeblock Codey Rocky Robot is ready to play with right out of the box. Codey Rocky Robot is a safe purchase if your kids are closer to six years old and are interested in robotics.
It’s a very cute-looking robot, but don’t be fooled; your kids will still be able to start their coding journey with it, and it’s packed full of features.
You can find the current price of the Makeblock Codey Rocky Robot here.
Wrapping Up
I hope this full review and guide of mBot Neo has helped shed some light on coding robots. While I coved a lot in this review, I really only scratched the surface of what mBot can do.
More importantly, I hope to show the journey someone can take, from being brand new to robotics and coding to assembling a robot and learning to code with a beginner language to more advanced coding.
My son and I have reviewed about a dozen robots, and out of all of them, mBot Neo is now my most recommended coding robot!
You can see the current price and check for the availability of mBot Neo here.
Do you know what a Raspberry Pi is for? Join us as we take a deep dive into what you can do with a Raspberry Pi.


Hi there,
we are trying to decide on which robot to order fir our 9 year old daughter… she already had Lego Boost to start with, but now want’s to go further. We are staying between mbot Ranger and mbot Neo… whereas the Neo seems to be more actual with Cyber Pi and chargable, the Ranger can be built into three different shapes and seems to have a short battery time and complicated battery changing. Also it seems to be a bit like Lego Boost – optically. Does your son prefer one of the two? Do you have an idea, how we could make the right decision? Many thanks – for this great blog and your help! All the best from Austria, Tina
Hey Tina, my son has put together both of those robots, and he likes mBot Neo better. Your daughter is going to have a rough time putting mBot Ranger together; you’re basically going to have to do it for her. She will be able to set Neo up with your help, but she should have no problem assembling 80% of it by looking at the pictures on the instructions.
Either way you go, she is going to love it 🙂
Hi! I’ve got a 7-year-old daughter interested in robots. She’s turning 8 in september and thought a robotics kit would be a great gift for her, but I’m struggling to decide between Mbox2 (Neo) or the original Mbot 1, which is half the cost. We haven’t done any coding or anything like that, but I also don’t want to buy something she can’t grow with/into it. Any suggestions between the Neo and the original?
Thanks!
Hey David! 7 is a little young, but if you show that you’re interested, it might spark something in her to really get her into robotics and STEM in general. Just go with the mBot 1 for now because it’s cheaper, but can still do a lot. She’ll have fun driving around, doing activities and grow into coding for it. Best of luck!